Additional Collision Control Strategies page
Use this page to establish additional collision control parameters for your Multiaxis toolpath. Collision control establishes clearance values and instructs the toolpath how to move the tool to avoid a collision.
 Parameters
Common toolpath dialog box controls
Parameters
Common toolpath dialog box controls
| Icon | Name | Description |
|---|---|---|

|
Detect (FBM Drill) | Analyzes the solid model and detects features based on the Feature Based Machining (FBM) operation's current parameters. View the results of all detected features and their machining information in the Features page. For more information, please refer to Detection States and Modes in FBM. |

|
Reselection is not available |
Hole Wizard features for a Wizard Holes operation can only be selected in Mastercam for SOLIDWORKS. Contact Mastercam for more information. NOTE
Mastercam for SOLIDWORKS is no longer supported starting with Mastercam 2024. |

|
Preview toolpath operations (FBM Drill/Wizard Holes) | Opens the Toolpath Operations Preview dialog box where you can view the list of operations FBM will generate using the current Features page list. |

|
Select default formulae file (3D high speed toolpaths) | Lets you select a different *.formula file, which Mastercam uses to calculate default values. |

|
Save parameters to defaults file | Makes the current toolpath settings the default for future toolpaths of this type. Saves the current values in the toolpath properties pages to the .mcam-defaults file specified in the machine group properties. |

|
Reload parameters from defaults file | Overwrites the current values in the toolpath properties pages with the toolpath's default parameters. These parameters are reloaded from the .mcam-defaults file specified in the machine group properties. |

|
Display graphical elements | Enables the display of graphical elements, such as plane labels and geometry colors. In 2D or 3D toolpaths Mastercam also has Display only elements on current page, Display plane labels, and Simplify plane display as options. |

|
Hide dialog | Minimizes the dialog box so that you can use other Mastercam functions, like changing your shading settings or the graphics window view. When finished, press [Esc] to maximize the dialog box. |

|
Tool Manager | Opens the Tool Manager. Use the Tool Manager to create and edit tool definitions and to work with tool libraries. When you close the Tool Manager, the toolpath dialog box will reappear just as you left it. |

|
Feed speed calculator | Opens the Feed & Speed Calculator dialog box where you can modify the calculated feed rate or spindle speed by adjusting the material and tool parameters. |
|
None |
Page window | This window displays all of the pages that are available to you, depending on the selected toolpath type. A green check mark indicates pages where data has changed in the current session. |
| None | Quick View Settings | This window summarizes key toolpath information from the Tool page, Coolant page, and Planes page. It updates automatically as you make changes to the different pages and is always visible. |
| None | Generate toolpath | When selected, automatically generates the toolpath when you click OK. For more information, refer to Accepting and Generating Toolpaths. |

|
OK | Generates the toolpath and closes the dialog box. If editing a toolpath, applies the changes and closes the dialog box. |

|
Apply | Applies your changes to the toolpath without closing the dialog box. |

|
Cancel | Closes the dialog box and cancels the toolpath creation. If editing a toolpath, any changes to the toolpath are discarded. |
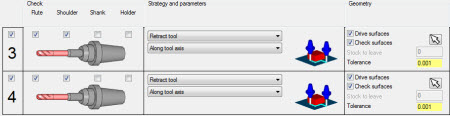
Status (3 and 4)
Select to activate a collision control strategy. Each subsequent strategy is dependent on the one above it.
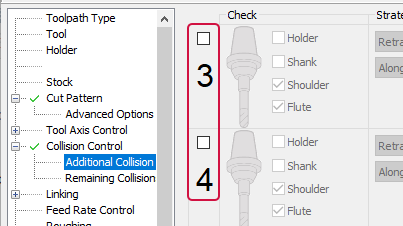
Check
Select the sections of the tool to perform gouge checking on. Use any combination of flute, shoulder, shank, or holder.
Strategy and parameters
Select the initial strategy from the upper drop-down list. Use the secondary drop-down list and checkbox to refine the parameters for the strategy, if available. The selections made here dictate which collision control sub-branches become available.
Machining geometries
Select to perform gouge checking on all drive surfaces. The checking tolerance will be set to the toolpath cut tolerance.
Avoidance geometries
Select to enable avoidance geometry. Choose the selection button, and in the graphics window, select the geometry to avoid during machining. You can select surfaces, solid faces, and meshes.
Color control
Use the color swatch to show the areas on the model with which the toolpath interacts. Click the swatch to change the color.
Stock to leave
Enter the amount of material to leave on the part model when the operation is finished.
Number of Surfaces
The number listed in the parentheses, next to the selection button, shows the number of selected avoidance geometries for the relevant strategy. Choose the selection button, and in the graphic window, select the required collision control surfaces. The dialog box will then display the number of selections next to the selection button.
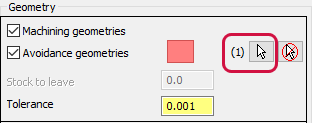
Tolerance
Enter the gouge checking tolerance to use for avoidance geometries. The Tolerance field is automatically populated from the Cut tolerance value on the Cut Pattern page.


